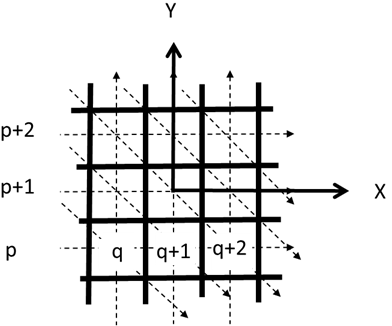
Figure 2:
CT grid and laser path.