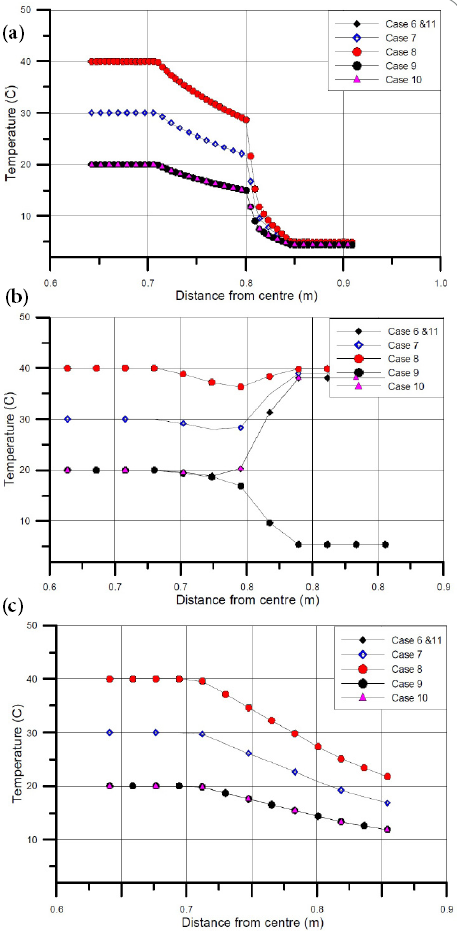
Figure 9:
(a)Monitoring point M1,(b)Monitoring point M2, (c)Monitoring point M3.