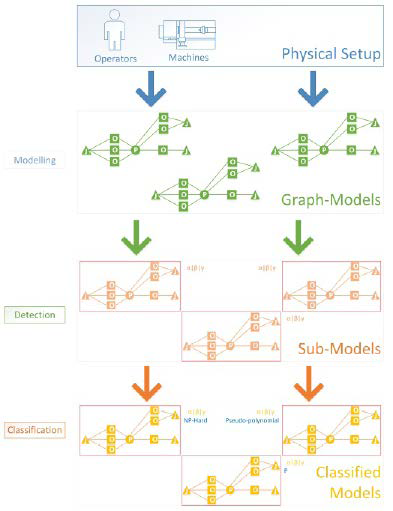
Figure 2:
Graphical Representation of the Approach.